Montag, 19. November 2012

what's your take on: "soap & glory"?


hello everyone

our new thing for sunday's [it might just be monday already ;) ] is "what's your take on...?". basically we want to know what you think about a product! is it good, is it bad or are there better products out there? so let's start off with one of my favourite skin/body care products of mine :)

may i present to you: flake away by soap & glory!


what it says: transform your scalpy legs from reptilian to radiant! a body-peeling with shea butter, sugar, sea salt, almond oil and peach seed powder.

what it does: scrubbing and flaking away all the dead body cells to make the skin soft.

flake away has more of a heavy creamy and buttery consistency, rather than being a super liquid soapy scrub. when i use this product it feels heavy on the skin at first but after it’s washed off and dried my skin feels smooth and moisturized.

i have completely fallen in love with this amazing product! after the first time i used it i couldn't stop touching my legs and smelling the amazing scent of this product! if i could i'd use it everyday all over my body - but i guess too much scrubbing isn't too good for the skin ;) - instead i use it on my legs and arms about two to three times a week to keep my skin soft and healthy.

it’s the best scrub i have used - ever! - and i will definetly repurchase this product!

after all this writing about how flake away is the best product i have ever come across i might just go to my bathroom right now and take a smell of that delicious scent ;)

so now it' your turn...

 i want to know what you think of soap and glory! have you ever used this or any other soap & glory products before? which one is your favorite? or maybe you didn't like a product and you want to share your experience? we want to know it all! :D

- xx B

Mittwoch, 14. November 2012

pumpkin and mushroom risotto

 hello there!

so today's blog post is a super yummy recipe for pumkin and mushroom risotto :) the great thing about risotto (apart from tasting delicious) is that you can make any kind of risotto once you know how to make your risotto-base :) we chose pumkin and mushroom because we felt like it, plus it really doesn't matter what kind of pumpkins or mushrooms you choose, the most important thing is that YOU like your ingridients ;)

our pumpin and mushroom risotto

list of ingridients
1 kg pumpkin
1 tsp black pepper
2 tsp coriander seeds
2 tsp oregano
dried chilli
500g mushrooms
3 spring onions (chopped)
1/2 celery
4 cloves of garlic
400g of risotto rice
100ml white wine (dry)
70g butter
100g parmesan cheese (grated)
1.5 l chicken stock
olive oil, salt


preparation is key

try to get as much work done before you really start cooking your risotto. this is one of those dishes where you have to stay by the stove, stir and make sure everything runs smoothly, so there won't be much time to deal with anything else. I would recommend, finely chopping your spring onions, celery, a handful of parsley, and two cloves of garlic. if your parmesan cheese is not grated yet, then do that. wash your veggies, cut your mushrooms into bite-sized pieces, heat up your chicken stock and get a frying pan, a baking and a nice big pot ready!


the actual recipe

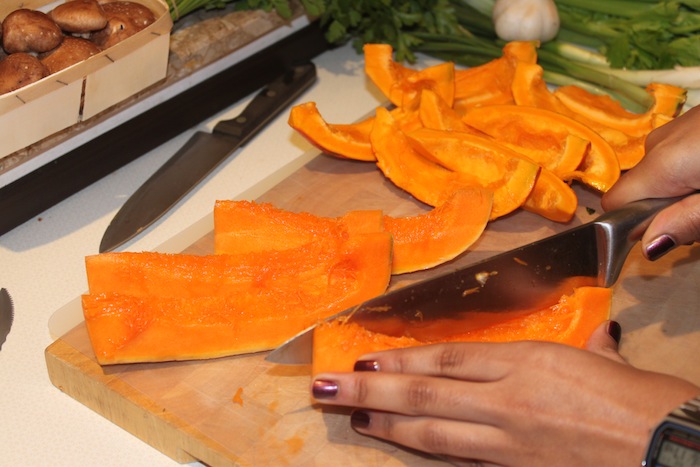
start by preheating your oven to 200°C.then go ahead and wash your pumpkins and cut them into nice thick slices. in a sturdy bowl (we used pestle and mortar) mix your coriander seed, black pepper, salt, chilli and pepper together and crush all the seeds to release the flavour. once your spices are mixed, add a good amount of olive oil and press two cloves of garlic into the mixture. then put your pumpkin slices in your baking pan and coat them with the paste. when you're done, put the pumpkin in the oven for about 30 minutes.

now that the pumpkin is in the oven, we're gonna start on our mushrooms so we can fully concentrate on the risotto later on. this step is easy. just toss the mushrooms in a pan with olive oil, cook for a few minutes, add salt and pepper and some parsley. done!

okay here comes the good stuff. put some olive oil in your pot on medium/high heat. once it's hot add your chopped celery, spring onions and garlic and stir. we don't want the veggies to get any color. risotto is supposed to be a very smooth dish. after a few minutes add the rice and stir for a while before you add the wine. when most of the wine has evaporated you can start adding maybe two to three scoops of your chicken stock. then stir. by the time the liquid has nearly evaporated again, add some more stock and keep on stirring. the trick is not to overdo it with the amount of liquid you add. slowly but surely you'll see how the risotto gets creamier and creamier. keep on adding liquid. after stiring for about 18-20 minutes you should check the rice. if it's just about done (we want the rice grain to have a bit of a crunch in the center) you add your last scoop of stock, cut the pumpkin into pieces (they should be done by now) and add them to the risotto as well as your mushrooms, butter and parmesan cheese and maybe some more salt and/or pepper. give it a good stir (maybe add one final scoop of broth), turn off the heat, put on the lid and let it sit for 5 minutes. after that, your risotto is done!

how do you know you did everything right? well risotto should be creamy and wet. risotto is eaten with a fork! so if you see your risotto and you think it's just a bit too liquidy to eat with a fork, then i'd say it's perfect! :)


hope you enjoyed this super delicious recipe and you'll try it out when you get the chance :)

xx
--B&S

Montag, 12. November 2012

Mani Monday #1: fall inspired ombre nails


hey everyone! 

today we're starting a new series calles „mani monday“ - hope you enjoy! :)


our fall inspired ombre nails

today i’m doing fall inspired ombre nails. the colours i’m using are
“ballet slippers“ from essie (basecoat), „chocolate cakes“ from essie (bottom),

maybelline „forever strong“ no.80 (middle),"big apple red" by o.p.i. (top) and the sponge im using is from the drugstore.


this is my first time trying to do ombre nails! i’m very excited and i hope they will turn out just great. so lets get started!

  1. i’m applying a basecoat from essie called „nourish me“ on to my nails to keep them healthy.
  2. then i’m appling two layers of the white nailpolish on all of my nails. this helps the colours to pop even brighter, once we've put them on.
  3. with a pair of sicssors i’m cutting the sponge into the right size, so it won't apply to much nailplish on my fingers.
  4. it's going to get messy and i’ll have to clean up my nails afterwards :( but here’s a trick to protecting the skin around the nail: put some duct tape on the skin around the nails so the nailpolish sticks to it and not the skin.
  5. now i’m putting my fall inspired nailpolishes on the sponge, in the pattern i want to have it. i’m using a brown, a dark red and a light red.
  6. let the fun begin! i’m pressing the sponge on to the nail and keep patting it on till the wonderful ombre pattern is perfect.
  7. step 5 and 6 have to be repeated on every single nail. this takes a while but it’s totally worth it!
  8. time to let the colours dry.
  9. to finish off the fall inspired ombre nails i’m using atop coat by essie called „good to go“ (favourite top coat ever!)
  10. my ombre nails are finished :)
I hope you found this helpul and inspring :) now its your turn, try some ombre nails of your own! If you do, please be sure to send us some pictures on twitter or tell us about your tips and tricks in the comments! so excited to see what you guys come up with!

xx -B